


When last we spoke, I shared with you that there was another flood here in
the house just two days after Christmas and that we were in the process of
replacing the damaged hardwood floors. I say another flood because less
than a year after buying this house and completing our first remodel, a burst
pipe in the garage flooded the house and ruined the new flooring. Faced with
having to replace the hardwood floors again, I decided to go a step further and
refresh/update the powder room and all the other rooms affected too! Below is
the powder room the day we made the offer on the house. Remember what I
have said many times before; we did not buy this house because we loved it! In
fact, I hated it the moment I saw it. However, coming from Monterey County in
California, where our home sat on just a 5,000 sq. ft. lot and shared a fence with
five other neighbors, it was the acreage we fell in love with. Everything inside the
house could be changed but the property was the property of our dreams... Minus
the rocky Pacific Coast views and mom and dad, who lived just around the corner!

This is the powder room five seconds after we moved in. The
wallpaper and everything in it just had to go! The last trip we
took as a family in California was to San Francisco where we
explored Alcatraz and went inside some of the prisoner cells...

We often joke that Alcatraz had nothing on this bathroom! After removing
all of the wallpaper, my sweet handy-husband repaired and painted the
walls in my favorite color... White! The toilet, 1971 vanity, complete with
laminate counter and broken faucet flew out the door and into a dumpster!

To maximize the space in this small bathroom, I chose a pedestal
sink and matching toilet. Both from Kohler's Memoirs collection

Before the original owners that built this house added a solarium off the
kitchen, (which we replaced with a more modern version) the window in
this bathroom looked out over the backyard. However, since the solarium
stands on a fully elevated foundation to match the house, the window in
this bathroom provided a full view of anyone using it! Nevertheless, without
the window, the bathroom would be terribly dark and feel even smaller than
it already is. So, since I don't do curtains, we decided the best way to retain
the natural light and provide the necessary privacy, was to fill the window
opening in with clear wavy glass block and frame it in. And, it worked!

After installing new vinyl over the old vinyl floor and a new door, we were
happy with this update and called it done. Buuttttt, I realized pretty quickly,
there is a huge difference between being happy with what a room looks like
after you rip out what you could never have lived with in the first place, and
getting a room that resembles something you might see Chip and Joanna
create on their show, Fixer-Upper! You know, the room of your dreams...

What I have realized over the years, while trying to bend this ugly old house into
something I can love, is that it is much better to stretch yourself and if necessary,
your budget, to get what you really want the first time. Looking back, it actually
makes me sad for the money and the time I wasted asking my husband to paint the
cabinets and tile over the Formica counter tops, instead of just going for the Carrara,
subway tile back splash and cabinet fronts I wanted for the kitchen in the first place!

Honestly... What was I thinking?!

So, just like when we re-remodeled the hallway bathroom a few years ago, I
decided that this time when we replaced the hardwood flooring, I was going to
choose the floor I really wanted. Not something that most closely matched what
we had and were accustomed to. Also, because we had this opportunity to update
the hardwood, I thought it was the perfect time to update the powder room too!

Above is the floor we almost put in. It was a compromise between what we chose
last time, which I knew was a mistake the day it went down and what I truly wanted...
Something a bit more rustic without that glossy nail polish finish the old floor had!

But did you catch that word compromise? It was a compromise because in my
heart I knew I really wanted a darker floor and I wanted it to be a gray floor
too. I compromised on the counter tops in the kitchen, settling for a Carrara
marble look-alike with Corian's Rain Cloud and I have always regretted it...

So... We took every sample of Mirage hardwood our flooring design center
would let us haul home and we compared them all. We compared them to the
kitchen cabinets, to our furniture and to the hardwood in the library and the
living room, which we would not be replacing. In the end, it came down to two...
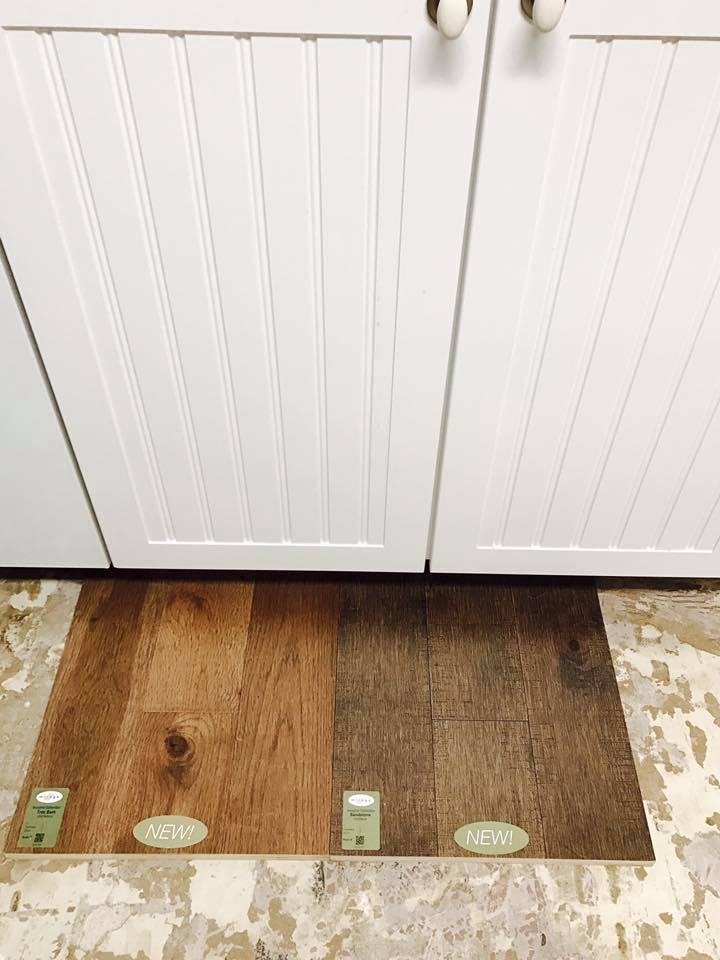
The safe, more traditional floor on the left and the totally different and darker
option on the right. In the end, I went for the one I wanted most. This one!

But more about the hardwood later... Right now, I want to finish telling you
about the powder room re-redo! See this photo below? It was sent to me by
my darling husband who wanted to ensure I would be completely happy with
the way he was laying the tile while I was at work. As you can see, I was not
at all shy about pointing out where I believed adjustments were needed!

We traded photos like this for a while. However, in the end, having a second
pair of eyeballs on the project helped him along. And, it helped me to see
the progress being made while I was stuck at work wondering about it!

I have said this in other DIY posts involving tile before and I am happy
to offer it as a warning again... Do not get all crazy about your tile work
before you grout. I mean, do straighten things that are crazy-crooked, but
don't get crazy about a little space here or a little tilt over there, since not
all tile is the same. Natural tile has natural variations in size and shape...

So let it be and grout it. Because once you grout your tile and it dries...

It will look crazy-fantastic and even be close to
perfect where it didn't look perfect at all before!

Since we were updating the floor in the powder room with
tile, I decided it was a good time to repaint as well as update the
switch plate and outlet covers, plus all the other hardware too!

In the end, we... We being my husband and the mouse in my pocket, painted
the entire downstairs; to include baseboards, crown molding and all the doors!
I also replaced all the outdated brass knobs on the cabinets and drawers in the
office/laundry room, which was an inexpensive way to update that room too!
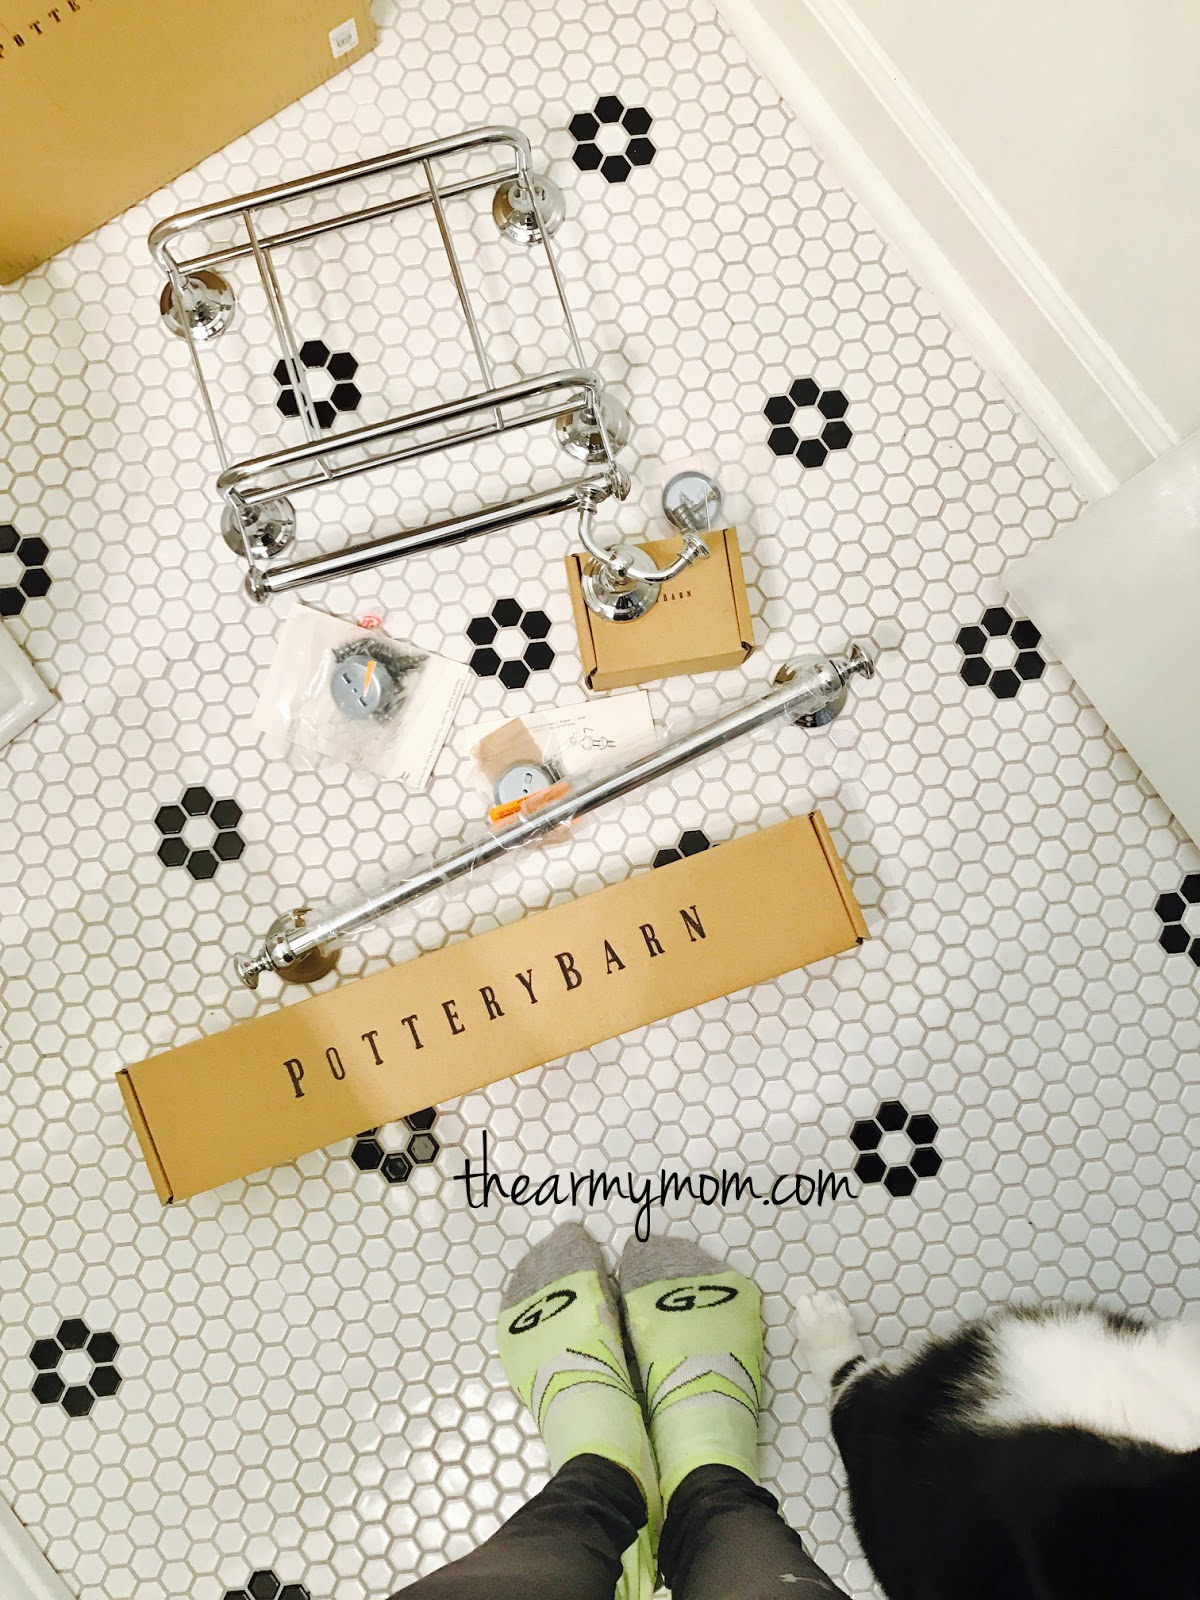
You know what a fan I am of everything Pottery Barn so
they were my first choice for new bathroom hardware. I started
with this Mercer magazine and double-roll paper holder
and then added the matching towel bar and robe hook!

Of course, I cannot get out of Pottery Barn without something
monogrammed so I also picked up these linen hand towels!

The final touch on our powder room re-redo was to add some artwork...
But I didn't want just anything hanging on the walls. I wanted something
that meant something to both of us. So, since we enjoy riding our bikes
and because I miss California so much, I sought out this antique-style
map of California bicycle trails and vintage bike-related advertising!

The fact that my name is there on the bottom made me love it even more!

it comes in standard frame sizes, it was very inexpensive to frame!

The other piece of artwork I chose is this reproduction of
a beautifully patriotic war poster. Again, patriotic needs no
explanation and since gardening is my husband's thing, it fits!

Also available in standard frame sizes, it cost me next to
nothing to have it framed, (using one of their weekly 40% off
coupons) at Hobby Lobby. Although it took nearly a month to
receive from this etsy seller, I still recommend her for this print!

It's just so special!

The last thing I added to finish the refresh of our powder room is
this cute little enamelware sign I placed onto the door. And, do let me
tell you... This black and white hex tile is not only a classic that will
always fit this house, it feels AH-mazing when you walk on it in your
bare feet! And, you want to know how much it cost? We found it at
our local Floor and Décor store on clearance for $2.30 a square
foot! Now, by the time we found it, they only had two pieces left. But
we had a great sales representative who suggested we order it through
the Floor and Décor website. Ordering couldn't have been easier and
with free shipping, the tile we needed cost just $86! Of course, the sack
of grout I bought cost $76 because I got talked into it by a salesman at
this ridiculously expensive tile store. However, in my defense, it is
Power Grout (the color I chose is Platinum) which already contains
a sealer so it never has to be sealed. It also will not stain or crack and
shrink as it dries. All very good things! Labor to install my new black
and white hex tile floor and hardware only cost me a steak dinner!

We'll chat more about the hardwood floors next post... But for now I
leave you with a few photos to show how changing the hardware
on the cabinets and drawers in the office/laundry room helped
to update the space and better compliment the new hardwood too!

Knobs chosen by the second/last owner of this home when they
added these cabinets and drawers to the laundry/mud room for the
office space needed by the man of the house that worked from home...

As you can see, the protective coating on these brass knobs to keep them
from tarnishing was chipped and worn off in spots from years of handling...

After the new hardwood flooring went in, I knew the antique
bronze finish on these knobs and drawer pulls would be the
perfect contrast and compliment to its rustic look and gray tone!

Not only did we update the hardware, we also replaced the light
fixtures and switch plates and outlet covers in this room too!

Although it took a little extra effort to countersink these drawer
cup pulls to replace those brass knobs, I think it was worth it!

Overall, I'm really happy with the way everything turned out...

Remember at the beginning of this post when I mentioned Chip
and Joanna Gains and their HGTV show, Fixer-Upper? I love them... So
imagine the thrill it was last week when we went to Texas to visit Ranger
and he took us to Waco, to visit Chip and Joanna's Magnolia Market!

And, the Bakery at the Silos!

Believe me, we made the most of our trip to Texas! I have plenty to share about all
our side-trips to visit the Spanish Missions and The Alamo in San Antonio, the
Pacific War and Nimitz museums in Fredericksburg, two more trips to Magnolia
plus the Dr. Pepper Museum in Waco... Our tour of Southfork Ranch, dinner

And, of course... There is the most important reason we
traveled back to Texas to visit Ranger in the first place!

To be there to see him raise his right hand to defend and protect the
constitution again and trade his Military uniform for a new uniform...

Believe it or not, we are in the process of selecting flooring and tile to re-redo
the master bathroom next! I've already had several contractors visit to give
estimates for a new custom vanity and built-in storage cabinet behind the door
to replace the old custom vanity and built-in storage cabinet behind the door I
had my husband tear out during our first remodel. There will be absolutely no
compromising as we rebuild this master bathroom, which means I will finally
get that Carrara marble counter top I have always wanted and dreamed of!

Stay tuned...

Because as you can see, we are just about
ready to make another trip to Floor and Décor!

#DIY #blackandwhitehextile #powderroomremodel #smallbathroomremodel #miragefloors #cabinethardware #vintageposters #fixerupperstyle #flooranddecor